
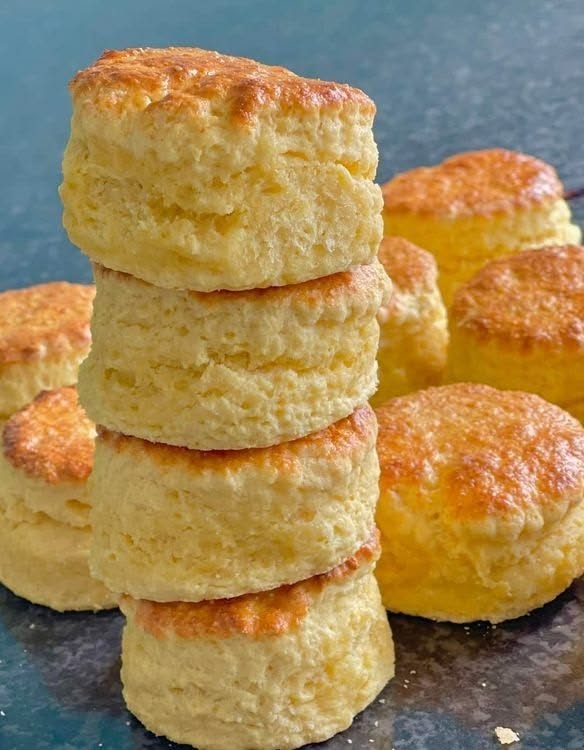
These homemade buttermilk biscuits are golden and crispy on the outside, with a soft, fluffy, buttery interior. Just like the biscuits in your picture, they rise beautifully in the oven and develop delicate layers that pull apart easily.
The best part is that you do not need special baking equipment or complicated ingredients. With flour, butter, buttermilk, and a few pantry staples, you can prepare bakery-style biscuits right in your kitchen.
This step-by-step recipe explains how to make tall, tender biscuits, including the important techniques that help them rise properly instead of becoming flat or dense.
Recipe Overview
Preparation time
20 minutes
Baking time
15–20 minutes
Yield
8–10 biscuits
Oven temperature
220°C / 425°F
Ingredients
Use cold butter and cold buttermilk for the best texture.
2 cups (250 g)
Provides structure while keeping the biscuits tender.
6 tablespoons (85 g)
Cold butter creates pockets that help produce flaky layers.
¾ cup (180 ml), approximately
Adds moisture and a gentle tangy flavor.
1 tablespoon baking powder and ¼ teaspoon baking soda
Help the biscuits become light and fluffy.
½ teaspoon salt and 1 teaspoon sugar
Balance the flavor and encourage gentle browning.
Optional: 1 tablespoon melted butter for brushing the tops after baking.
Step-by-Step Instructions
Step 1: Preheat the Oven
Preheat your oven to 220°C (425°F). A properly heated oven is essential because the initial burst of heat helps the biscuits rise quickly.
Line a baking tray with parchment paper. If you do not have parchment paper, use a clean, lightly greased baking tray.
Measure all your ingredients before beginning. Keep the butter and buttermilk in the refrigerator until you are ready to use them. Cold ingredients help create a tender texture and distinct layers.
Step 2: Mix the Dry Ingredients
Add the flour, baking powder, baking soda, salt, and sugar to a large mixing bowl.
Whisk the ingredients together for approximately 20–30 seconds. This distributes the leavening agents evenly throughout the flour and helps the biscuits rise consistently.
If your flour contains lumps, sift it before mixing. Avoid adding extra baking powder, as too much can create an unpleasant aftertaste and weaken the biscuit structure.
Step 3: Cut the Cold Butter into the Flour
Cut the cold butter into small cubes and add it to the flour mixture.
Using your fingertips, a pastry cutter, or two forks, work the butter into the flour until the mixture resembles coarse crumbs with some small, pea-sized pieces of butter remaining.
Do not melt the butter before mixing. Those small pieces are important because they create steam during baking, helping the dough develop flaky layers.
If the butter begins to soften, place the bowl in the refrigerator for 5–10 minutes before continuing.
Step 4: Add the Buttermilk
Pour approximately ¾ cup of cold buttermilk into the flour mixture. Stir gently with a fork or spatula until a rough, slightly sticky dough forms.
The dough should hold together without becoming smooth or wet like cake batter. If it seems too dry and there is still loose flour at the bottom, add another teaspoon of buttermilk at a time.
Avoid mixing for too long. Overworking the dough develops gluten, which can make the finished biscuits tough instead of tender.
If you cannot find buttermilk, mix ¾ cup of milk with 2¼ teaspoons of lemon juice or white vinegar. Let it stand for 5–10 minutes before using.
Step 5: Fold the Dough to Create Layers
Gently bring the dough together with your hands. Pat it into a rectangle about 2 centimeters thick, then fold one side over the other.
Rotate the dough a quarter turn, pat it out again, and repeat the folding process three or four times.
This simple technique creates layers without requiring complicated pastry skills. Handle the dough gently, and do not knead it like bread dough.
Finally, pat it into a slab approximately 2.5–3 centimeters thick. Thicker dough generally produces taller biscuits.
Step 6: Cut the Biscuits
Use a round biscuit cutter, approximately 5–6 centimeters wide, to cut the dough into individual biscuits.
Press the cutter straight down into the dough and lift it straight up. Avoid twisting the cutter, because twisting can seal the edges and interfere with rising.
Gather the leftover dough gently and press it together to cut additional biscuits. Try not to handle the scraps too much.
Arrange the biscuits on the prepared tray with their sides just touching for softer sides, or leave a little space between them for more browning around the edges.
Step 7: Brush the Tops
For a beautiful golden finish, lightly brush the tops with a little buttermilk or milk.
Keep the liquid on the tops rather than allowing it to run down the cut sides. This helps encourage browning without affecting the edges that need to rise.
For extra flavor, you can brush the biscuits with melted butter immediately after baking instead. This gives them a rich aroma and a soft, buttery finish.
Step 8: Bake Until Golden Brown
During the first several minutes, the baking powder reacts and the heat creates steam from the cold butter. The biscuits should rise and develop a golden crust.
Begin checking them around the 15-minute mark. They are ready when the tops are golden brown and the sides appear set. Larger biscuits may need a few additional minutes.
If your oven browns unevenly, rotate the tray carefully near the end of baking. Avoid opening the oven repeatedly, especially during the initial rise.
Step 9: Brush with Butter and Cool
Remove the tray from the oven and let the biscuits rest for approximately 5 minutes.
While they are still warm, brush the tops with melted butter if desired. The butter adds flavor and makes the crust slightly softer and shinier.
Transfer the biscuits to a serving plate or wire rack. Allow them to cool briefly before pulling one open to reveal the fluffy interior.
For the best texture, serve them warm rather than leaving them uncovered for a long time.
Step 10: Serve and Enjoy
Serve your homemade biscuits with butter, honey, jam, or fruit preserves. They are also delicious alongside scrambled eggs, omelets, fried chicken, soups, and stews.
For a savory breakfast, split a biscuit and fill it with scrambled eggs and cheese. For a sweeter treat, drizzle honey over a warm biscuit and enjoy it with tea or coffee.
Tips for Perfect Fluffy Biscuits
-
Keep everything cold: Cold butter and buttermilk help create a flaky texture.
-
Do not overmix: Stop stirring as soon as the dough comes together.
-
Fold instead of kneading: Gentle folds help create distinct layers.
-
Cut straight down: Avoid twisting the cutter.
-
Use fresh baking powder: Old leavening agents may produce flat biscuits.
-
Bake in a hot oven: The high temperature encourages a quick rise.
-
Do not make the dough too thin: A thickness of 2.5–3 centimeters helps create tall biscuits.
Common Mistakes to Avoid
Dense biscuits usually result from overworking the dough, using too much flour, or adding too little liquid. Flat biscuits may be caused by warm butter, old baking powder, or dough that is rolled too thin.
If the dough feels slightly sticky, resist the temptation to add lots of flour. Use just enough to prevent sticking, because excess flour can make the biscuits dry.
If the tops brown too quickly while the centers remain undercooked, check your oven temperature and move the tray to the middle rack. Baking times can vary depending on your oven and the size of the biscuits.
Storage and Reheating
Store completely cooled biscuits in an airtight container at room temperature for up to 2 days, or refrigerate them for approximately 4–5 days.
To reheat, place them in a 160°C (320°F) oven for 5–8 minutes, or warm them briefly in an air fryer. You can also microwave one for 10–15 seconds, although the crust will be softer.
For longer storage, freeze the baked biscuits in a sealed freezer-safe bag for up to 3 months. Thaw and reheat them before serving.
You can also freeze the unbaked, cut biscuits and bake them from frozen, adding a few extra minutes to the cooking time and checking that the centers are fully baked.
Frequently Asked Questions
Can I make biscuits without buttermilk?
Yes. Use milk mixed with lemon juice or white vinegar as described in Step 4. The acidity helps replicate some of the flavor and baking properties of buttermilk.
Why did my biscuits not rise?
Possible reasons include old baking powder, warm butter, overworked dough, or a low oven temperature. Check your leavening agents and make sure the oven is fully preheated.
Can I prepare the dough ahead of time?
Yes. Cut the biscuits, cover them, and refrigerate them for several hours before baking. For longer storage, freeze them unbaked.
Can I make these biscuits without a round cutter?
Absolutely. Cut the dough into squares with a sharp knife. This avoids leftover scraps and reduces handling.
Final Thoughts
Homemade buttermilk biscuits are simple, comforting, and delicious. Their golden tops, soft centers, and flaky layers make them a wonderful addition to breakfast, brunch, or dinner.
The secret is to use cold butter, handle the dough gently, fold it a few times, and bake the biscuits in a properly heated oven. Follow these steps, and you can create tall, fluffy biscuits similar to the ones in your picture.
Serve them warm with butter and honey, or turn them into savory sandwiches for a satisfying homemade treat.

