
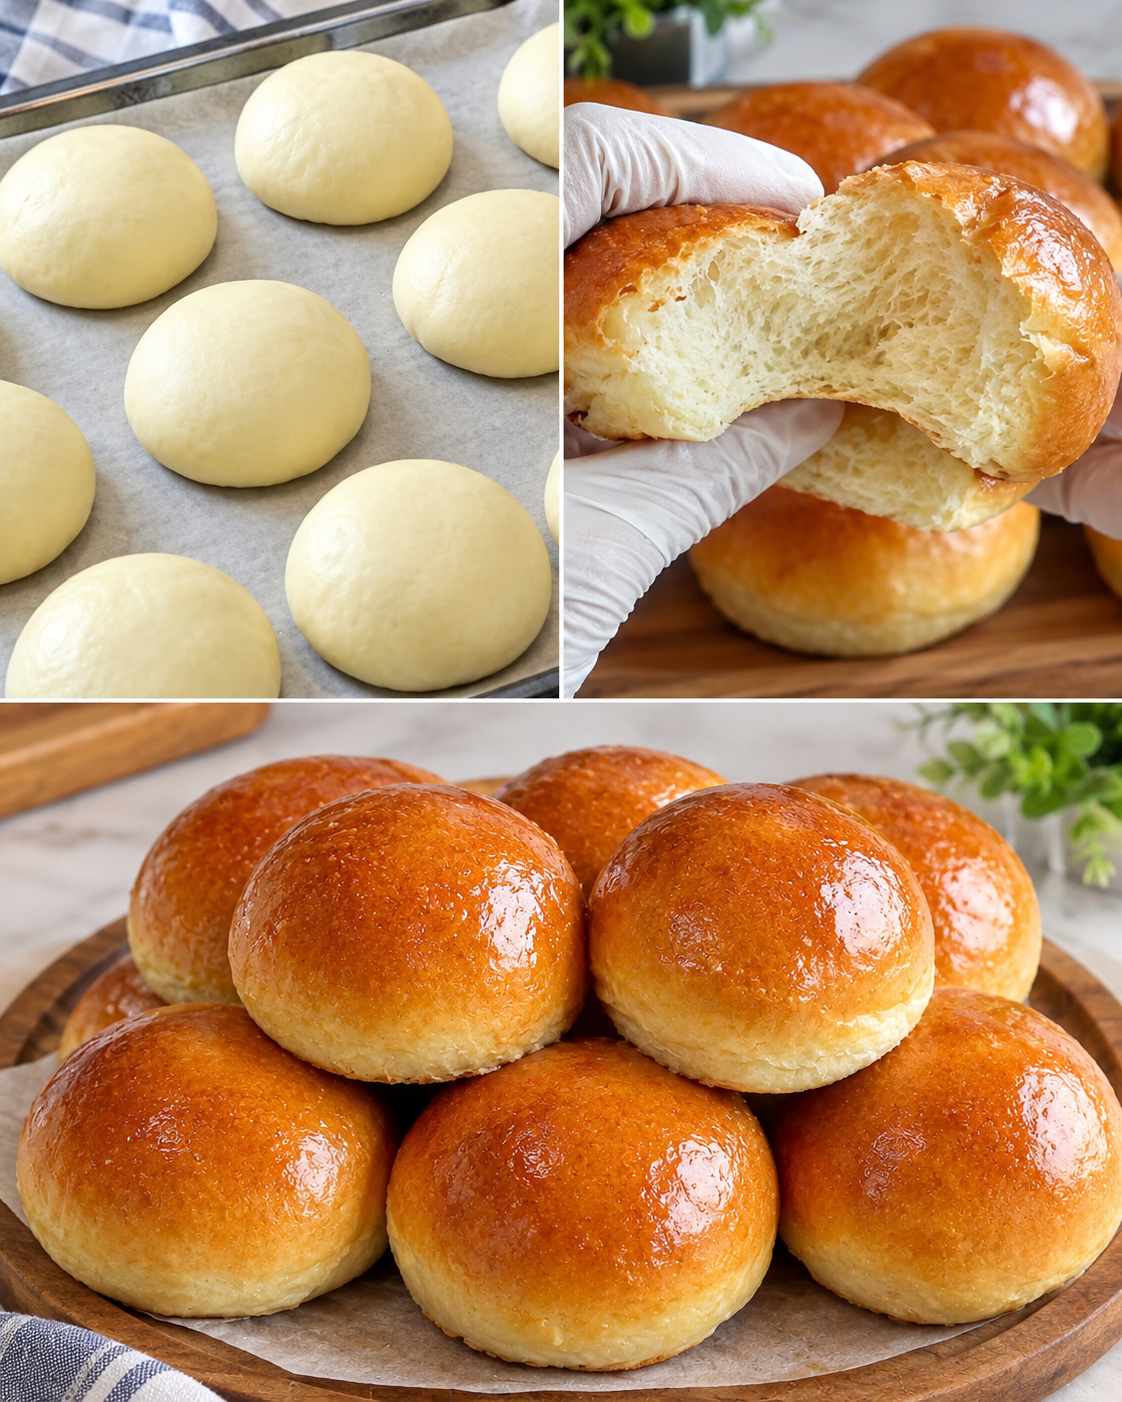
Homemade Soft and Fluffy Dinner Rolls Recipe
These homemade dinner rolls are soft, fluffy, buttery, and beautifully golden on the outside. This easy step-by-step recipe makes bakery-style bread rolls with a tender, airy inside and a shiny top, perfect for breakfast, sandwiches, dinner, or serving with soup.
Recipe Details
-
Prep time: 25 minutes
-
Rising time: 1 hour 30 minutes to 2 hours
-
Baking time: 18–22 minutes
-
Total time: Approximately 2 hours 30 minutes
-
Servings: 12 rolls
-
Difficulty: Easy
Ingredients
-
3½ cups (440 g) all-purpose flour or bread flour
-
1 cup (240 ml) warm milk
-
2¼ teaspoons instant yeast (one standard packet)
-
3 tablespoons sugar
-
1 large egg, at room temperature
-
4 tablespoons (56 g) softened unsalted butter
-
1 teaspoon salt
-
1 tablespoon oil, for greasing the bowl
For the egg wash
-
1 egg
-
1 tablespoon milk
Optional finishing touch: 1 tablespoon melted butter for brushing over the hot rolls.
Step-by-Step Instructions
Step 1: Prepare the yeast mixture
Pour the warm milk into a large mixing bowl. The milk should feel comfortably warm, not hot. Add the sugar and instant yeast, then stir gently to combine.
Let the mixture sit for about 5 minutes. Instant yeast can be mixed directly with flour, but allowing it to hydrate helps distribute it evenly.
If you are using active dry yeast instead of instant yeast, let it stand for 5–10 minutes until foamy. Avoid very hot milk because excessive heat can damage the yeast and prevent the dough from rising properly.
Step 2: Add the egg and butter
Add the egg and softened butter to the milk mixture. Whisk until the egg is incorporated and the mixture looks reasonably smooth.
The butter should be soft enough to press with a finger but not completely melted. Softened butter helps give the rolls their rich flavor and tender texture.
Add the salt and approximately 3 cups of flour. Reserve the remaining flour for adjusting the dough as needed.
Step 3: Mix the dough
Stir the ingredients with a wooden spoon or spatula until a rough dough forms. Gradually add more flour if the dough is extremely sticky.
Do not add all the reserved flour automatically. Depending on the flour and humidity, you may need slightly more or less than the listed amount.
The dough should feel soft and slightly tacky. A dough that is too dry can produce dense rolls, while a slightly moist dough helps create a fluffy interior.
Step 4: Knead until smooth
Transfer the dough to a lightly floured work surface. Knead by pushing the dough away with the heel of your hand, folding it back, and turning it slightly.
Continue kneading for approximately 8–10 minutes by hand, or 5–7 minutes with a stand mixer fitted with a dough hook.
As you knead, the dough will become smoother, stretchier, and more elastic. If it sticks to your hands, lightly grease your hands instead of adding large amounts of flour.
To check whether the dough is ready, stretch a small piece gently. It should stretch thinly before tearing. This indicates that enough gluten has developed to help the rolls rise.
Step 5: Let the dough rise
Lightly grease a clean bowl with oil. Place the dough inside and turn it once so the surface is lightly coated.
Cover the bowl with a clean kitchen towel, lid, or plastic wrap. Leave it in a warm, draft-free place for approximately 60–90 minutes, or until the dough has doubled in size.
The exact rising time depends on your kitchen temperature. In a cool room, the dough may take longer.
Avoid placing the dough somewhere excessively hot. A gentle, warm environment allows the yeast to work steadily and produces better flavor.
Step 6: Divide the dough into portions
Once the dough has doubled, gently press it to release excess gas. Transfer it to your work surface.
Divide the dough into 12 approximately equal portions. For evenly sized rolls, weigh the dough and divide the total weight by 12.
Take one portion at a time and fold its edges underneath. Cup your hand around it and roll it gently against the counter until the surface becomes smooth and round.
Repeat with the remaining portions. Proper shaping helps the rolls rise evenly and gives them attractive rounded tops.
Step 7: Arrange the rolls on a baking tray
Line a baking tray with parchment paper. Arrange the dough balls with a little space between them so they can expand.
For separate round rolls, leave approximately 2 inches between each ball. For softer, pull-apart dinner rolls, arrange them slightly closer together.
Cover the tray loosely with a clean towel and let the rolls rise for another 30–45 minutes.
They should look noticeably puffier and feel light when gently touched. If an indentation springs back slowly, the rolls are generally ready to bake.
Step 8: Preheat the oven
While the rolls complete their second rise, preheat your oven to 375°F (190°C).
Allow the oven to reach the correct temperature before baking. An adequately preheated oven helps the dough rise during the first few minutes of baking and encourages even browning.
Position the oven rack in the center. If you use a dark baking tray, check the rolls a little earlier because dark metal can brown their bottoms more quickly.
Step 9: Apply the egg wash
Whisk one egg with one tablespoon of milk in a small bowl.
Using a pastry brush, gently brush a thin layer over the tops of the risen dough balls. Try not to press too hard because the rolls are delicate at this stage.
The egg wash gives the finished rolls their glossy, golden-brown appearance. For a softer, less shiny finish, you can use milk alone.
Be careful not to let excess egg wash pool around the bottoms, as it may bake into uneven patches.
Step 10: Bake until golden brown
Place the tray in the preheated oven and bake for approximately 18–22 minutes.
Watch for evenly golden-brown tops and lightly browned sides. The rolls should feel set but remain soft when handled gently.
If the tops brown too quickly before the centers are cooked, loosely cover the tray with aluminum foil for the remaining baking time.
For a reliable check, the center of a roll should reach approximately 190°F (88°C). Oven performance varies, so use color and internal temperature together rather than relying on time alone.
Step 11: Brush with butter
Remove the tray from the oven and place it on a heat-safe surface.
While the rolls are still hot, brush their tops with melted butter. This adds flavor, enhances their shine, and helps keep the crust tender.
For a slightly sweeter finish, you can mix a small amount of honey into the melted butter. This is optional and changes the flavor of the rolls.
Allow the rolls to rest on the tray for about 5 minutes before transferring them to a wire rack.
Step 12: Cool and serve
Let the rolls cool for at least 10–15 minutes before tearing them open. Their interiors continue to settle as they cool, helping maintain a light texture.
Serve them warm with butter, jam, honey, scrambled eggs, or your favorite breakfast spread. They are also excellent alongside soups, stews, roasted chicken, and family dinners.
For sandwiches, allow the rolls to cool completely before slicing so the soft crumb does not compress.
Tips for the Softest Homemade Rolls
-
Measure flour carefully: Too much flour is one of the most common reasons homemade rolls turn out heavy.
-
Use warm, not hot, milk: Excessive heat can damage yeast.
-
Knead thoroughly: Good gluten development creates an elastic dough and a fluffy interior.
-
Give the dough enough time: Watch its size and texture rather than following the clock alone.
-
Avoid overbaking: Excessive baking dries out the crumb.
-
Brush with butter: Applying butter after baking adds flavor and helps soften the crust.
Common Mistakes to Avoid
Why are my rolls dense? The dough may contain too much flour, may not have been kneaded enough, or may not have risen sufficiently.
Why did my rolls spread instead of rising upward? The dough may be too wet, the shaping may be too loose, or the rolls may have risen for too long.
Why are my rolls pale? The oven may not be fully preheated, or the egg wash may have been omitted. The egg wash is optional, but it helps create a deeper golden color.
Why are the bottoms too dark? Try using a lighter-colored baking tray, placing the tray on the center rack, or checking the rolls a few minutes earlier.
Storage and Reheating
Store completely cooled rolls in an airtight container at room temperature for up to 3 days. Avoid refrigerating them if possible, as refrigeration can make bread stale more quickly.
To reheat, warm the rolls in a 300°F (150°C) oven for approximately 5–8 minutes. Covering them loosely with foil can help prevent them from drying out.
For longer storage, place cooled rolls in a freezer-safe bag and freeze for up to 2–3 months for best quality. Thaw at room temperature and warm before serving.
Frequently Asked Questions
Can I prepare the dough ahead of time?
Yes. After kneading, cover the dough and refrigerate it overnight. The next day, let it warm slightly, shape the rolls, and allow them to rise until puffy before baking.
Can I make these rolls without eggs?
Yes. You can omit the egg and add approximately 2–3 tablespoons of extra milk if needed. The texture and richness may differ slightly. Brush the tops with milk or melted butter instead of egg wash.
Can I use bread flour?
Yes. Bread flour often produces a slightly chewier roll because it contains more protein. All-purpose flour works well for a softer, tender dinner roll.
How do I know when the rolls are fully baked?
Look for golden tops, set sides, and a cooked center. If using a thermometer, aim for approximately 190°F (88°C) in the center of a roll.
Final Thoughts
These homemade soft and fluffy dinner rolls are a wonderful addition to any meal. With simple ingredients, careful kneading, two rises, and a buttery finish, you can make beautiful golden rolls right in your own kitchen. Serve them fresh from the oven, share them with family, or freeze a batch for an easy homemade bread option whenever you need it.

