
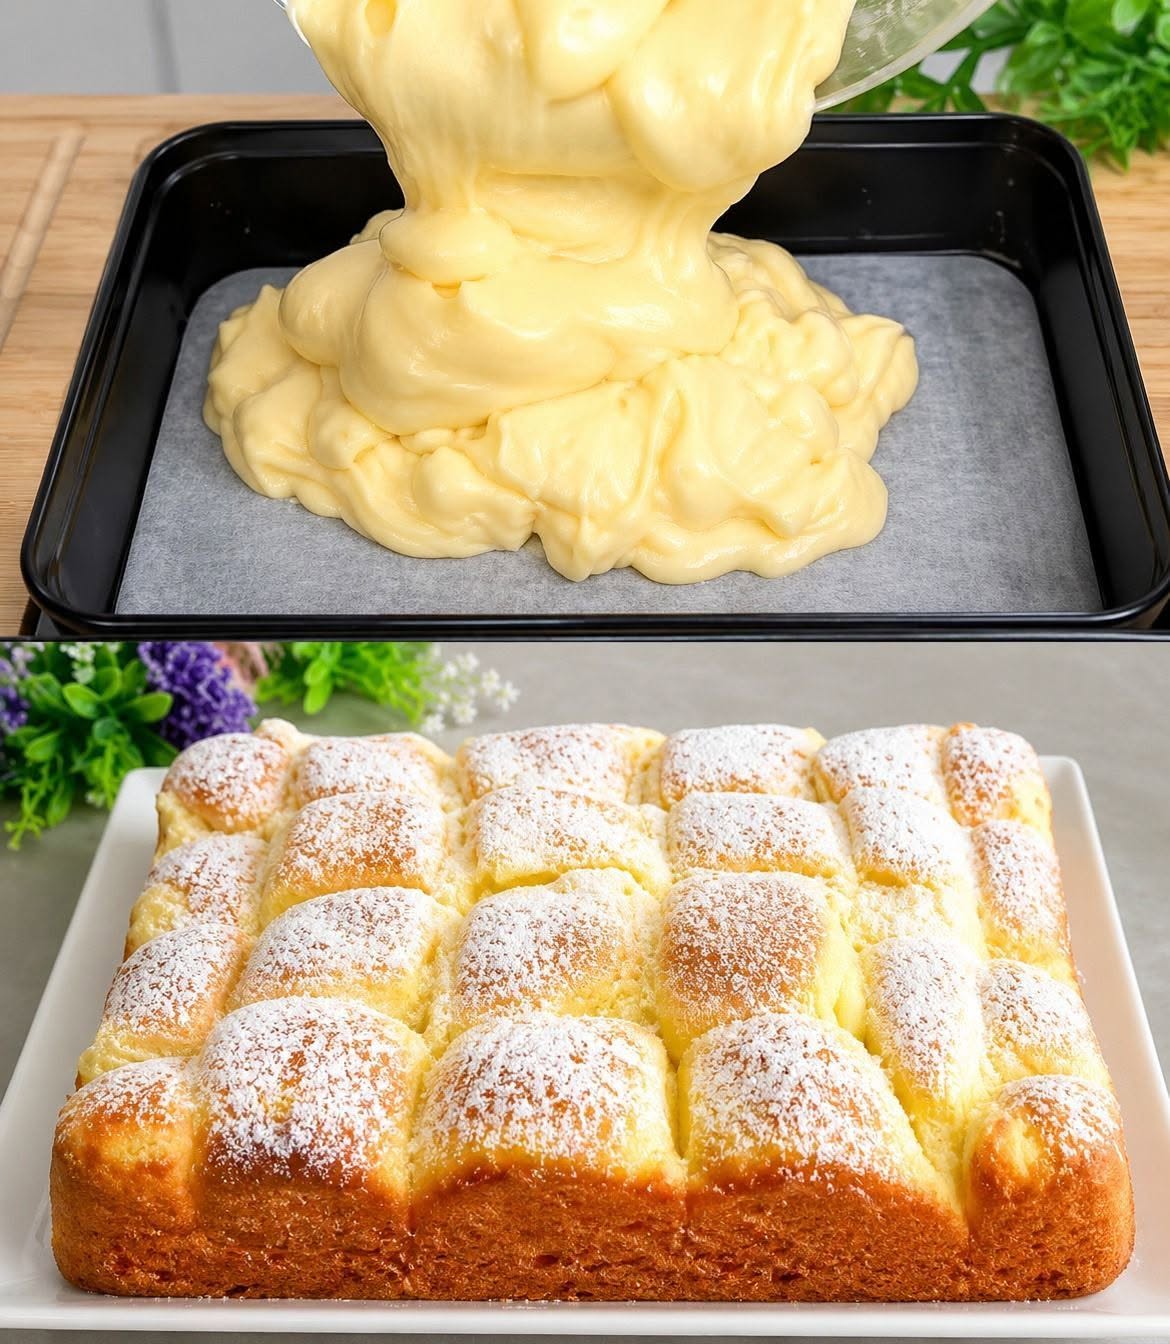
Fluffy Vanilla Butter Buns Recipe: Step-by-Step Guide
Fluffy vanilla butter buns are a delightful homemade treat with a soft, pillowy texture, a rich buttery aroma, and a sweet vanilla flavor. These beautiful buns are perfect for breakfast, afternoon tea, family gatherings, or a special dessert. Their golden-brown tops, tender crumb, and delicate dusting of powdered sugar make them look as wonderful as they taste.
This step-by-step recipe combines a soft enriched yeast dough with creamy vanilla filling to create bakery-style sweet buns. Even if you are new to baking, you can make these delicious treats at home by following the instructions carefully.
Recipe Overview
Preparation time
30 minutes
Rising time
1 hour 30 minutes
Baking time
25–30 minutes
Servings
12–16 buns
Oven temperature: 180°C (350°F)
Ingredients
For the soft butter dough
-
3 cups (375 g) all-purpose flour or bread flour
-
2¼ teaspoons (7 g) instant yeast
-
¼ cup (50 g) granulated sugar
-
½ teaspoon salt
-
1 large egg, at room temperature
-
¾ cup (180 ml) lukewarm milk
-
¼ cup (57 g) unsalted butter, softened
-
1 teaspoon vanilla extract
For the creamy vanilla filling
-
2 cups (480 ml) milk
-
¼ cup (50 g) granulated sugar
-
2 egg yolks
-
2 tablespoons cornstarch
-
1 tablespoon unsalted butter
-
2 teaspoons vanilla extract
For finishing
-
1 tablespoon milk or beaten egg for brushing, if desired
-
Powdered sugar for dusting
-
A little softened butter for greasing the pan, if needed
Step 1: Prepare the Vanilla Filling
Begin by making the vanilla filling so it has enough time to cool before you assemble the buns.
-
Pour the milk into a saucepan and heat over medium-low heat until steaming. Do not let it boil vigorously.
-
In a separate bowl, whisk together the egg yolks, sugar, and cornstarch until smooth.
-
Slowly pour a little warm milk into the egg mixture while whisking continuously. This helps prevent the eggs from scrambling.
-
Pour the mixture back into the saucepan and cook over medium-low heat, stirring constantly.
-
Continue stirring until the custard becomes thick, smooth, and creamy.
-
Remove the saucepan from the heat and stir in the butter and vanilla extract.
-
Transfer the custard to a clean bowl and cover its surface with plastic wrap to prevent a skin from forming.
Allow the custard to cool completely. Refrigerate it if necessary, keeping it covered until you are ready to use it.
Tip: The filling should be thick enough to hold its shape. If it is too runny, it may spread excessively during baking.
Step 2: Mix the Dough Ingredients
In a large mixing bowl, combine the flour, instant yeast, sugar, and salt. Mix thoroughly to distribute the ingredients evenly.
Add the lukewarm milk, egg, and vanilla extract. Stir with a wooden spoon or spatula until a rough dough begins to form.
Add the softened butter and continue mixing until it is incorporated into the dough.
The dough may initially feel sticky, which is normal for soft, enriched bread. Avoid adding too much extra flour, as this can make the finished buns dense instead of fluffy.
If you use active dry yeast rather than instant yeast, dissolve it in the lukewarm milk with a little sugar first and let it stand for about 5–10 minutes, until foamy.
Step 3: Knead Until Smooth and Elastic
Transfer the dough to a lightly floured work surface. Knead for approximately 10–15 minutes by hand, or 7–10 minutes using a stand mixer with a dough hook.
Stretch, fold, and push the dough until it becomes smooth, elastic, and slightly tacky.
To check whether it is ready, stretch a small piece gently between your fingers. If it forms a thin membrane before tearing, the gluten has developed well.
The dough should feel soft and supple rather than stiff.
Baking secret: Proper kneading is essential for fluffy buns. It develops the gluten structure that traps the gas produced by the yeast, helping the dough rise into a light and tender texture.
Step 4: Let the Dough Rise
Place the kneaded dough in a lightly greased bowl. Turn it once so the surface is lightly coated with oil or butter.
Cover the bowl with a clean kitchen towel or plastic wrap. Leave it in a warm, draft-free place for approximately 60–90 minutes, or until it has doubled in size.
Rising time depends on the room temperature and yeast activity. In a cool kitchen, the dough may need longer.
Avoid placing the dough somewhere excessively hot, as high temperatures can damage the yeast and cause the butter to melt prematurely.
Step 5: Shape the Buns and Add the Filling
Once the dough has doubled, gently press it to release excess air.
-
Transfer it to a lightly floured work surface.
-
Divide it into 12–16 equal portions.
-
Roll each portion into a smooth ball.
-
Flatten each ball slightly with your palm.
-
Place approximately 1–2 teaspoons of chilled vanilla custard in the center.
-
Bring the edges together and pinch firmly to seal the filling inside.
Place each filled bun seam-side down in a greased or parchment-lined square baking pan. Arrange the buns close together, leaving a little room between them for expansion.
For a look similar to the finished buns in the photograph, use a square pan and arrange the portions in neat rows.
Do not overfill the dough, because too much custard can leak out during baking.
Step 6: Allow the Buns to Rise Again
Cover the shaped buns loosely and leave them in a warm place for another 30–45 minutes.
During this second rise, the dough should become noticeably puffier and the buns should begin touching one another.
To check their readiness, gently press the side of a bun with a fingertip. The indentation should slowly spring back rather than disappearing immediately.
This second rise is especially important because it creates a light, airy interior.
Meanwhile, preheat your oven to 180°C (350°F). Make sure the oven is fully heated before baking.
Step 7: Bake Until Golden Brown
If desired, lightly brush the tops with milk or beaten egg for a more attractive golden finish.
Place the baking pan on the middle rack of the preheated oven. Bake for approximately 25–30 minutes, or until the tops are golden brown and the dough is cooked through.
If the buns brown too quickly, loosely cover the pan with aluminum foil during the final part of baking.
The bottoms should be golden, and the centers should no longer look raw or doughy. If you are uncertain, check the center of a bun with a thermometer; enriched bread is generally done at around 88–93°C (190–200°F).
Remove the pan from the oven and allow the buns to cool for at least 10–15 minutes before handling them.
Step 8: Finish With Butter and Powdered Sugar
For an extra buttery flavor, brush the warm tops with a small amount of melted butter.
Allow the buns to cool slightly, then dust them generously with powdered sugar using a fine sieve.
The sugar adds a delicate sweetness and gives the buns a beautiful bakery-style appearance. Serve them warm or at room temperature.
When you pull the buns apart, the interior should be soft and fluffy, with a creamy vanilla center and a rich buttery aroma.
Tips for Perfect Fluffy Vanilla Butter Buns
-
Use lukewarm milk: Very hot milk can damage the yeast. Aim for approximately 35–40°C (95–104°F).
-
Measure flour carefully: Too much flour can produce heavy, dry buns. A kitchen scale gives the most reliable results.
-
Use softened butter: Butter should be soft enough to mix easily into the dough, but not melted.
-
Cool the custard: Warm filling can make the dough difficult to shape and seal.
-
Give the dough enough time: Watch the dough’s size and texture rather than relying only on the clock.
-
Avoid overbaking: Excessive baking can dry out the soft interior.
-
Store properly: Keep the cooled buns in an airtight container in the refrigerator for up to 3 days because they contain custard. Reheat gently before serving.
Serving Suggestions and Variations
These vanilla butter buns taste wonderful with a cup of tea, coffee, or warm milk. They can also be served as a sweet breakfast, an afternoon snack, or a dessert after dinner.
For a variation, replace the vanilla custard with chocolate pastry cream, thick fruit jam, or a cinnamon-sugar filling. You can also add a little lemon zest to the custard for a refreshing citrus flavor.
For a richer finish, drizzle the cooled buns with a simple glaze made from powdered sugar and a few teaspoons of milk.
Frequently Asked Questions
Can I prepare the dough ahead of time?
Yes. After kneading, cover the dough and refrigerate it overnight. The next day, allow it to warm slightly, shape the buns, fill them, and complete the second rise before baking.
Why did my buns turn out dense?
Common causes include adding too much flour, insufficient kneading, inactive yeast, inadequate rising time, or overbaking.
Can I make these buns without the custard filling?
Absolutely. The buttery dough makes delicious plain sweet rolls. You can brush them with melted butter and sprinkle them with sugar after baking.
How should I store leftover buns?
Because the filling contains milk and eggs, refrigerate leftovers promptly in a covered container. For the best texture, warm individual buns briefly before serving.
Conclusion
Fluffy vanilla butter buns are a wonderful combination of soft homemade bread, creamy vanilla custard, and a delicate powdered-sugar finish. With careful kneading, proper rising, and a little patience, you can create beautiful bakery-style buns in your own kitchen.
Follow each step, avoid rushing the dough, and keep the filling thick and cool before assembling. The result is a batch of golden, tender, pull-apart buns that are perfect for sharing with family and friends. Enjoy them fresh from the oven for a comforting homemade treat!

